This time of year, it's almost impossible to think of costuming without thinking of Halloween, that day in which wearing a costume is considered normal. Once upon a time, back in the mid-twentieth century, it was mostly children who wore costumes. If they had mothers who sewed, they might have a very elaborate costume indeed. Or, if they didn't, they might end up wearing a sheet with a couple of holes for eyes, as in "It's The Great Pumpkin, Charlie Brown!"
Nowadays, however, with more and more adults getting into the act, stores devoted to Halloween pop up across the US, temporarily touting costumes and accessories to make them look even more real. Almost any classification of costume is available, from ancient Egyptians through any period of history to horror, outer space, and beyond. If you can find what you want there, fine. Enjoy!
If, however, you want something well-made that will last beyond a wearing or two, you should consider making your own. If you want a complete suit of armor, I do recommend finding an armorer, unless you do auto body work. Some parts and accessories are better left to the professionals. For the rest, however, you can set your imagination to work, find a pattern and just the right fabric, and have some costuming fun!
Many of the major pattern companies have patterns for costuming. Unless you're making costumes professionally, these are a wonderful choice. McCall, Butterick, Kwik Sew, Simplicity, Burda, and even Craftsy all have great costume patterns for sale. You don't have much time left for this year, but you if you go for something easy, you can still come up with something wonderful. Hope these suggestions help!
Tuesday 22 October 2013
Tuesday 1 October 2013
Sewing Tools
If you're ready to add to your costume authenticity by some hand sewing, you may need to add a few items to your sewing box.

Beeswax is used to keep the thread from tangling and to move through the fabric more smoothly. You can wax the thread either before or after you've threaded your needle. Just run the thread through the beeswax and you're done.
 A pincushion will give you a place to keep your needles and pins. Pincushions come in all kinds of styles,although these days we're most used to the ones shaped like tomatoes. Sometimes they come with a strawberry attached. The strawberry usually contains...

An Awl is used to ream holes in eyelets. If you're making corsets or anything that requires lacing, you'll be making eyelets. You may ream the hole before or after you install the grommet (unless you're stitching them by hand using the buttonhole stitch).


A Grommet or Eyelet Setter will help you safely squeeze the two halves of the grommet or eyelet together with the fabric sandwiched between them. Grommets will make a sturdier hole support for lacing than the buttonhole stitch, but it's up to you which you choose. There are two types: the tiny one that is available with a set of eyelets, used if you aren't setting a lot of eyelets or grommets. If you use lots of grommets, you may want to invest in a grommet setter/hole punch with a rotating wheel. This is not only quicker and easier on your hands, but allows you to set various sizes of grommets with just one setter.

Self-covered button set. These are usually available at the fabric store. You can find them with the setter included, or get a refill set that has just the buttons. I've had mixed results with self-covered buttons. My observation is that they work best with thin fabrics. However, you can use them with velvet if you cut the circle of fabric larger and skip the backing completely. I'll be doing a post on buttons soon with instructions on how to make self-covered buttons.

The sewing bird or hemming bird is like a third hand. (Indeed, one brand calls it Third Hand!) During the Victorian Era, these little tools were sometimes shaped like actual birds. Nowadays they're simpler, but they do the same thing. You attach the sewing bird to a sturdy table or to the arm of a chair--whatever it will fit. Turn the screw until it holds firmly. Then you fasten the fabric into the clip and it will hold it steady for you while you work the seam or the hem. Another neat usage for the sewing bird is to hold strands of thread or yarn for braiding. I've braided raffia using mine, and it works great. (It does slip on occasion, but that's easily remedied.)


Thread scissors are small, like embroidery scissors, which you can use for that purpose. You can also use a tiny shear to clip threads, especially if you're reenacting.
We'll talk about scissors, shears and rotary cutters at another time. How you cut out your fabric is a matter of personal preference. Most likely you won't be cutting out fabric pieces during a reenactment. However, if you are, there are antique-style scissors and shears available out there.
- sewing box, a place to keep all your dandy tools
- sewing bird, hemming bird
- hand needles
- thimbles
- beeswax
- pincushion
- emery
- awl
- grommet setter
- self-covered button kit
- thread scissors or snips
You're probably already familiar some of these items.
You should already have hand needles. I covered some basic stitches in How Authentic Do You Want To Be?
If you're doing hand stitching, a thimble will be both an asset and an annoyance, depending on how you learn to use it. Thimbles are used not only to push a needle through difficult or many layers of fabric, but to keep you from hurting yourself. Sewing through heavy fabric can really wreak havoc on your fingers. All sorts of materials can be used to make thimbles, but you probably won't want to use a decorative china thimble for a lot of sewing. Metal thimbles are standard and less breakable than plastic ones, although those can be a good substitute. (Not, of course, if you're doing handwork at a reenactment or faire.) Thimbles do come in various sizes, so be sure you get one that fits. You may also want to get a leather thimble. It's more adjustable, plus, due to its flexibility, you can grab the needle more efficiently.
Beeswax is used to keep the thread from tangling and to move through the fabric more smoothly. You can wax the thread either before or after you've threaded your needle. Just run the thread through the beeswax and you're done.
A pincushion will give you a place to keep your needles and pins. Pincushions come in all kinds of styles,although these days we're most used to the ones shaped like tomatoes. Sometimes they come with a strawberry attached. The strawberry usually contains...
...Emery. This is used to keep your needles and pins sharp and free from rust. Nowadays most needles and pins are made of stainless steel, but you'll still need to sharpen them from time to time. A sharp needle pierces the fabric more efficiently.
An Awl is used to ream holes in eyelets. If you're making corsets or anything that requires lacing, you'll be making eyelets. You may ream the hole before or after you install the grommet (unless you're stitching them by hand using the buttonhole stitch).
A Grommet or Eyelet Setter will help you safely squeeze the two halves of the grommet or eyelet together with the fabric sandwiched between them. Grommets will make a sturdier hole support for lacing than the buttonhole stitch, but it's up to you which you choose. There are two types: the tiny one that is available with a set of eyelets, used if you aren't setting a lot of eyelets or grommets. If you use lots of grommets, you may want to invest in a grommet setter/hole punch with a rotating wheel. This is not only quicker and easier on your hands, but allows you to set various sizes of grommets with just one setter.
Self-covered button set. These are usually available at the fabric store. You can find them with the setter included, or get a refill set that has just the buttons. I've had mixed results with self-covered buttons. My observation is that they work best with thin fabrics. However, you can use them with velvet if you cut the circle of fabric larger and skip the backing completely. I'll be doing a post on buttons soon with instructions on how to make self-covered buttons.
The sewing bird or hemming bird is like a third hand. (Indeed, one brand calls it Third Hand!) During the Victorian Era, these little tools were sometimes shaped like actual birds. Nowadays they're simpler, but they do the same thing. You attach the sewing bird to a sturdy table or to the arm of a chair--whatever it will fit. Turn the screw until it holds firmly. Then you fasten the fabric into the clip and it will hold it steady for you while you work the seam or the hem. Another neat usage for the sewing bird is to hold strands of thread or yarn for braiding. I've braided raffia using mine, and it works great. (It does slip on occasion, but that's easily remedied.)
Thread scissors are small, like embroidery scissors, which you can use for that purpose. You can also use a tiny shear to clip threads, especially if you're reenacting.
We'll talk about scissors, shears and rotary cutters at another time. How you cut out your fabric is a matter of personal preference. Most likely you won't be cutting out fabric pieces during a reenactment. However, if you are, there are antique-style scissors and shears available out there.
I hope you enjoy your hand sewing!
Tuesday 24 September 2013
Fabrics, Part 2
 It may come as a disappointment to discover that some historical fabrics are no longer available today. What we call muslin is a vastly different thing from Regency muslin. That was a fine and elegant cotton fabric, suitable for day dresses, and sometimes woven with "sprigs," as was illustrated on the cover of an excellent romance by Georgette Heyer.
.jpg)
 Muslin nowadays, at least in the USA, is nowhere near the lovely, delicate fabric that made such dainty dresses. In order to get the same look, you'll need to substitute similar fabrics. Cotton gauze or a fine batiste will give much the same effect. Silk muslin or mousseline is still in use, but has a stiffer weave. You can also use lightweight printed cottons to much the same effect.
The movie versions of Jane Austen's novels had such a problem, which they solved admirably. Note the similarity between the actual printed cotton fabrics in the Museum of Costume in Bath, UK, to the costumes used by the BBC. Polly Maberley wore the yellow printed dress as Kitty Bennett in the 1995 BBC television production of Pride and Prejudice. Note how similar it is to the actual period dresses show just behind it. For more information, be sure to visit the Museum of Costume website. (Link above.)
 |
| 1871 Parisian Mourning Dress Surrender Dorothy has this page from a fashion magazine offered on their page. |
 TextureImages.net shows this incredible photo, giving an idea of just how firm a fabric you'll need as a substitute. While jean can be suitably heavy, it won't have the slight sheen the silk gives. You can use a woolen twill, or search for a heavy silk twill.
While searching for bombazine online, I came across Thistle Hill Weavers. They don't offer bombazine currently, but they do work with the fibers that go into it, and they take custom orders. It would be expensive, but if you absolutely must be completely authentic, you could request a custom order.
Whatever you decide in creating your costume, enjoy the process. Finding the right pattern, fabric and trims is half the fun!
Happy Sewing!
Tuesday 17 September 2013
How Authentic Do You Want to Be?
When you have chosen your time and your character, the next problem you'll face is authenticity. How authentic do you have to be in order to be correct? If you're doing living history, you'll probably need as close to 100% authenticity as possible.
 If you want to be authentic and not just look it, you can't use a sewing machine for costumes prior to the 1860s. While there were some sewing machines beginning in the 1850s, they were not generally available. In addition, the original sewing machines were not lock-stitch like modern machines. Using just one thread, the machine sewed a chain stitch. That was fine....unless a thread broke. Then the entire seam ripped out!
 In 1877, the Merrow Company began manufacturing crochet machines (known today as overlocks or sergers). They are still made today. While I've been unable so far to locate information on how much the original overlocks were used in the late 19th Century, you can certainly use them for 20th Century costumes, especially beginning with the 1980s.
If you are like most of us, you find the idea of hand sewing an entire garment daunting! For cases like this, you can compromise and use a sewing machine for interior seams that will not be seen. For all external stitching, you can do hand work. Hems, for example, will look more natural if done by hand rather than machine stitching. (You can compromise and use the blind hem stitch, but unless your costume is late 20th century, I'd avoid serged hems and even topstitching.)
If you have never done hand sewing (and with the great machines on the market these days, many people haven't), why not start with small projects until you master the stitches? The sampler was a teaching aid for many of our young ancestresses. While many of them show only decorative stitches, you can make your own sampler with assorted hand stitch work, and then use it as your guide as you construct your garment.
Here's a list of the basic stitches you'll need the most.
One thing you will notice if you do decide to make the entire costume by hand: even if you press the seams open, they will not be as perfectly smooth as a machine stitched seam. You'll see a slight waviness, due to the nature of hand sewing. This is perfectly all right, and even desirable in some cases. How durable the seam is depends on which stitch you use.
So, to recap: if you don't have the patience to make a costume entirely by hand, go for just the visible parts. Hemming by hand will make a big enough difference to most costumes. Costumes with visible outer stitching may be done by hand.
 If you want to be authentic and not just look it, you can't use a sewing machine for costumes prior to the 1860s. While there were some sewing machines beginning in the 1850s, they were not generally available. In addition, the original sewing machines were not lock-stitch like modern machines. Using just one thread, the machine sewed a chain stitch. That was fine....unless a thread broke. Then the entire seam ripped out!In 1877, the Merrow Company began manufacturing crochet machines (known today as overlocks or sergers). They are still made today. While I've been unable so far to locate information on how much the original overlocks were used in the late 19th Century, you can certainly use them for 20th Century costumes, especially beginning with the 1980s.
If you are like most of us, you find the idea of hand sewing an entire garment daunting! For cases like this, you can compromise and use a sewing machine for interior seams that will not be seen. For all external stitching, you can do hand work. Hems, for example, will look more natural if done by hand rather than machine stitching. (You can compromise and use the blind hem stitch, but unless your costume is late 20th century, I'd avoid serged hems and even topstitching.)
If you have never done hand sewing (and with the great machines on the market these days, many people haven't), why not start with small projects until you master the stitches? The sampler was a teaching aid for many of our young ancestresses. While many of them show only decorative stitches, you can make your own sampler with assorted hand stitch work, and then use it as your guide as you construct your garment.
Here's a list of the basic stitches you'll need the most.
- The Running Stitch
- Just the way it sounds, this is a simple, straightforward stitch. Like a machine chain stitch, however, if it breaks, the entire seam is apt to unravel. If you're going to do a running stitch, I recommend adding a Backstitch every few stitches.
- The Backstitch
- Viewed from the top of the seam, a backstitch looks exactly like machine stitching (if you have a steady hand). The other side of the seam, however, tells a different story. I like to think of this stitch as "one step forward, two steps back," although it is definitely not a bad way to progress. On the back, you see how the needle has moved the length of two stitches.
- Backstitch forms a VERY firm join, but it's time consuming. Worked in combination with Running Stitch, it works great.
- Hem Stitch
- This stitch can be as firm or flexible as you need, depending on the fabric. You can take just one thread, and make the stitching almost invisible.

Naturally, you can use decorative stitches, but for costuming purposes, those fall more under the classification of embroidery.
One thing you will notice if you do decide to make the entire costume by hand: even if you press the seams open, they will not be as perfectly smooth as a machine stitched seam. You'll see a slight waviness, due to the nature of hand sewing. This is perfectly all right, and even desirable in some cases. How durable the seam is depends on which stitch you use.
So, to recap: if you don't have the patience to make a costume entirely by hand, go for just the visible parts. Hemming by hand will make a big enough difference to most costumes. Costumes with visible outer stitching may be done by hand.
Tuesday 3 September 2013
Adapting Garments
Happy Tuesday!
Today, I'm discussing an aspect of costume that is great for beginners: adapting clothes you already have to a particular costume period.
Obviously, some clothes are more adaptable than others. You won't be able to take a t-shirt and jeans and turn it into anything earlier than the mid-to-late twentieth century. However, those same jeans, if plain enough, can work for a laborer's mid-to-late nineteenth century costume. Levi's 501 button-front jeans would be the best choice for that, as zippers weren't generally available in men's trousers until the 1930s. That was also the decade in which zippers were first promoted in children's clothing, as a way for children to be independent and easily dress themselves.
First, choose your era. If you're reading this blog, you've probably already done that.
I decided on 1880 for this adapted costume because we were visiting Tombstone frequently and hanging out with friends who reenact the shootout at the OK Corral. (I never got to do any reenacting, but that's beside the point.)
I chose for the upper element a lightweight cotton print dress. It already had several elements going for it
So, choose your period, and then look for clothes you may already have that can adapt to that period. You may be surprised at what you already own that, with a little imagination and a bit of sewing, can become one of your favorite costumes!
Today, I'm discussing an aspect of costume that is great for beginners: adapting clothes you already have to a particular costume period.
Obviously, some clothes are more adaptable than others. You won't be able to take a t-shirt and jeans and turn it into anything earlier than the mid-to-late twentieth century. However, those same jeans, if plain enough, can work for a laborer's mid-to-late nineteenth century costume. Levi's 501 button-front jeans would be the best choice for that, as zippers weren't generally available in men's trousers until the 1930s. That was also the decade in which zippers were first promoted in children's clothing, as a way for children to be independent and easily dress themselves.
First, choose your era. If you're reading this blog, you've probably already done that.
I decided on 1880 for this adapted costume because we were visiting Tombstone frequently and hanging out with friends who reenact the shootout at the OK Corral. (I never got to do any reenacting, but that's beside the point.)
I chose for the upper element a lightweight cotton print dress. It already had several elements going for it
- a squared neckline, which was the standard in the 1880s.
- a lightweight fabric that would be easy to manipulate
- a lapped zipper to which I could sew buttons, making it appear to button up the back (another standard of the 1880s)
- a princess-seamed bodice

Not only that, but it more or less matched the long pleated skirt a friend had given me.
The actual work involved was simple. I sewed plain white buttons onto the zipper lap. Then I gathered the skirt up each side to create a polonaise, sewing by hand and securing the stitches so they wouldn't come loose. This I wore over a long-sleeved blouse with a high neckline and stand up collar, plus the long skirt. Instant 1880s costume. Would it satisfy a dedicated living history reenactor? Probably not. However, it has the look and the feel, and for this costume, at least, that's enough.
I made the hat from some craft felt, lace, and some shoulder pads, then added a purchased bird ornament. If I get enough requests, I may do a post on how to make hats from shoulder pads!
So, choose your period, and then look for clothes you may already have that can adapt to that period. You may be surprised at what you already own that, with a little imagination and a bit of sewing, can become one of your favorite costumes!
Tuesday 13 August 2013
Time to Sew
Perhaps a better title for this would be "No Time to Sew!" In today's society, when it's possible to be busy 24/7, it's sometimes hard to fit in time for things we love to do. Work and family can swallow up even our "extra" time.
Still, it's important to our mental health for us to have a bit of time we can devote to doing something we love. The old saying had it "All work and no play makes Jack a dull boy." (Of course, all play and no work can have even more disastrous results, but that's another story.)
If costuming is your love, you won't be able to bring a huge sewing project with you wherever you go. It's impractical, and people will give you suspicious glances. However, one overlooked aspect of costuming is accessories. Some of these are highly portable, attract favorable rather than displeased attention, and will get your costume farther along. Here are some suggestions:
Lace handkerchiefs.
Lap quilt.

Still, it's important to our mental health for us to have a bit of time we can devote to doing something we love. The old saying had it "All work and no play makes Jack a dull boy." (Of course, all play and no work can have even more disastrous results, but that's another story.)
If costuming is your love, you won't be able to bring a huge sewing project with you wherever you go. It's impractical, and people will give you suspicious glances. However, one overlooked aspect of costuming is accessories. Some of these are highly portable, attract favorable rather than displeased attention, and will get your costume farther along. Here are some suggestions:
Lace handkerchiefs.
- Whether or not you make your own lace, you can bring a small square of linen with you. The rest of your supplies will include either pre-made lace and a needle with matching thread, or, if you're a tatter, a tatting shuttle and reel of cotton.
- Handkerchiefs were an important part of life before the invention of facial tissue, and whether or not you use it according to its original purpose, your outfit will be more complete with a "hankie." Be sure to match the style and size of lace to your costume period and Sumptuary Laws, if they exist in the time frame. Some earlier reenactment periods don't allow for lace.

Lap quilt.
- You can't bring a huge quilting frame with you everywhere you go, but you can bring a quilting hoop to work on individual squares that you can sew together later. Georgia Bonesteel's excellent books and programs on the concept of Lap Quilting changed the way a lot of people quilt, including me!
- It may seem counterintuitive to say you can have more time for quilting if you hand-piece rather than sew by machine, but if you have little time to sit down and sew and lots of time when you're having to wait for something (say, in a doctor's office, at the garage getting your car repaired, etc.), it can be an easy way to get time to quilt into your day!
- Even if you machine piece the top first, you can still bring individual squares with you to hand-quilt with a relatively small quilting or even an embroidery frame.
- The added benefit of hand-piecing is that you can bring it safely to a reenactment without fear of modern techniques being ridiculed by the purists.

Gloves.
- Gloves are appropriate in many time periods, and are small enough to work on while on break, in a waiting room, etc.
- Gloves can be hand sewn of fabric or fine glove leather (which will be very thin and pliable).
- Gloves may also be knitted or crocheted. I've even tatted gloves, though it's more of a challenge and not for beginning tatters. A combination of techniques may be used. I haven't tried hairpin lace yet, but I'm sure it could be beautifully combined with other needlework to make amazing gloves.
Socks and stockings.
- If you're truly adventurous and a good knitter, you can bring a sock or stocking pattern with you, along with the appropriate needles for knitting in the round.

- Silk stockings can be cut out of the silk at home and then hand sewn, which could be done anywhere.
- You can embroider "clocks" onto silk stockings that haven't had their back seam sewn yet, and have an appropriate and much less expensive addition to your 18th Century costume.
Scarves, shawls and cravats.
- Scarves and shawls have gone in and out of favor over the centuries, but for those time periods where they are popular, they make a great accessory.
- A scarf can range anywhere from 14 inches square (roughly 35.5 cm) to the long, narrow versions in favor with early twentieth century pilots.
- Shawls vary in shape and size from the very small (which can sometimes mimic a Bertha collar) to ones large enough to wrap around you twice.
- Cravats should be of fine, crisp linen, which you should cut outwoven or sewn. beforehand and then can hem using the rolled handkerchief hem technique.
- Scarves and shawls can be knitted, crocheted,
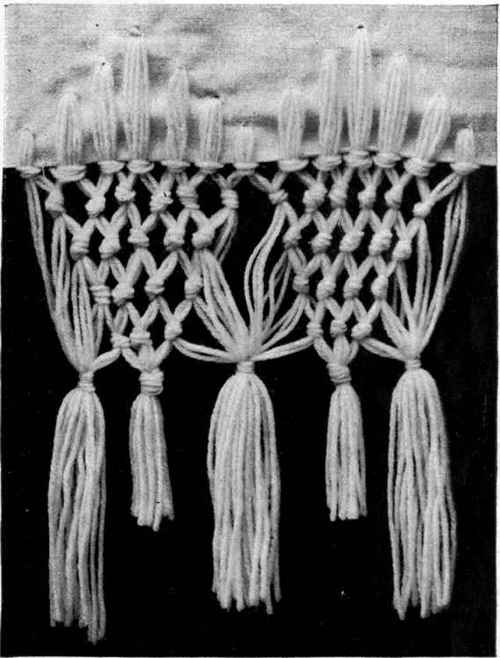
- A popular pastime in the Georgian and Regency periods in England was "knotting a fringe" for shawls. This was macrame, pure and simple, and could be a small enough project to carry with you. The original fringes were most likely of silk. While the cost would be prohibitive for many of us, rayon threads would make an acceptable substitute.

I'm sure there are other accessories one could make that have small enough parts to bring along with you. I didn't mention beadwork, because if the beads get away from you in a crowded room, you'll never manage to recover them all! Any kind of jewelry making is also best done at home or in your workshop, if you're blessed enough to have one.
I hope today's blog will inspire you to find something portable to work on while you're away from home, or while you're at home entertaining company. Who knows, your friends might like to join you in starting a small project of their own!
Tuesday 12 February 2013
Fabrics, Part 1
The very earliest "fabrics" were skins and furs. I'll write more on those later, as the methods of their preparation is vastly different from other fabrics.
 Wool is sheared from living animals, especially sheep, goats (cashmere), camelids (camel, alpaca,
llama, etc.), and musk oxen (quiviut). Primarily, however, the term "wool" refers to fibers sheared from sheep. (See below for a discussion of the "other" wools.) Sheep's wool is easily dyed, another plus. One of the earliest methods of forming fabric from wool is felting, where the wool is washed in hot water with some sort of soap and then rubbed by hand until the fibers mat together. Modern methods achieve this with machines, but you can still make your own felt today, either by using wool fabric or natural wool fibers.
Wool is sheared from living animals, especially sheep, goats (cashmere), camelids (camel, alpaca,
llama, etc.), and musk oxen (quiviut). Primarily, however, the term "wool" refers to fibers sheared from sheep. (See below for a discussion of the "other" wools.) Sheep's wool is easily dyed, another plus. One of the earliest methods of forming fabric from wool is felting, where the wool is washed in hot water with some sort of soap and then rubbed by hand until the fibers mat together. Modern methods achieve this with machines, but you can still make your own felt today, either by using wool fabric or natural wool fibers.
Linen is made by gathering the stems of the flax plant, then soaking them until they swell. The process is called retting. Once the fibers are free of the outer stalk, they can be dried and woven. No good modern method of creating linen has been successfully developed, which is one reason why linen is so expensive.
Cotton is another ancient fabric, which, unlike linen, was made both in the Old World and the New. Harvesting used to be a time-consuming process, as did removing the seeds from the fluffy fibers of the pod. Eli Whitney's invention of the cotton gin, to remove the seeds by machine, greatly simplified the process, reducing the cost in the 19th Century.
Silk, according to legend, was discovered when a silkworm cocoon dropped into the teacup of a Chinese princess. If true, she must have been amazed at the long, lustrous, single thread she was able to unwind from cocoon. History records that the Empress Si-Ling-Chi was raising silkworms by 2640 BC. The only insect-produced fiber has many different variations in the weaves, one of the most popular of which is silk satin.
Ramie is another natural fiber, sometimes called China grass. It behaves somewhat like linen. Nowadays, it's often blended with other fibers, notably cotton and silk.
The "other" wools come from a variety of fur- or wool-bearing animals. Goats give us mohair and cashmere. Camel hair comes from (of course) camels. Other members of the camel family provide alpaca, llama, guanaco, huarizo and misti (crosses between alpaca and llama, the camelid versions of a mule and a hinny), and vicuña. Angora comes from angora rabbits, which are clipped just like sheep, only much more frequently. (No harm comes to the angora rabbits!) Quiviut is taken from the soft underwool of musk oxen.
Depending on your costume time period, you may choose one or more of the fabrics made from these fibers. In a future post, I'll also discuss historic fabric blends (such as linsey-woolsey). In the meantime, while you're doing your research, I recommend the following books:
Claire Shaeffer's Fabric Sewing Guide
Fabric Science, Fifth Edition
A History of Costume
The fabrics of first handmade manufacture are the woolens and linens, so ancient that they are mentioned in the Bible. Cotton cultivation came later, along with silk, which, due to the difficulty of obtaining it during the Middle Ages, became very popular among the royal, noble and wealthy merchant classes of Europe.

Linen is made by gathering the stems of the flax plant, then soaking them until they swell. The process is called retting. Once the fibers are free of the outer stalk, they can be dried and woven. No good modern method of creating linen has been successfully developed, which is one reason why linen is so expensive.
Cotton is another ancient fabric, which, unlike linen, was made both in the Old World and the New. Harvesting used to be a time-consuming process, as did removing the seeds from the fluffy fibers of the pod. Eli Whitney's invention of the cotton gin, to remove the seeds by machine, greatly simplified the process, reducing the cost in the 19th Century.
Silk, according to legend, was discovered when a silkworm cocoon dropped into the teacup of a Chinese princess. If true, she must have been amazed at the long, lustrous, single thread she was able to unwind from cocoon. History records that the Empress Si-Ling-Chi was raising silkworms by 2640 BC. The only insect-produced fiber has many different variations in the weaves, one of the most popular of which is silk satin.
Ramie is another natural fiber, sometimes called China grass. It behaves somewhat like linen. Nowadays, it's often blended with other fibers, notably cotton and silk.
The "other" wools come from a variety of fur- or wool-bearing animals. Goats give us mohair and cashmere. Camel hair comes from (of course) camels. Other members of the camel family provide alpaca, llama, guanaco, huarizo and misti (crosses between alpaca and llama, the camelid versions of a mule and a hinny), and vicuña. Angora comes from angora rabbits, which are clipped just like sheep, only much more frequently. (No harm comes to the angora rabbits!) Quiviut is taken from the soft underwool of musk oxen.
Depending on your costume time period, you may choose one or more of the fabrics made from these fibers. In a future post, I'll also discuss historic fabric blends (such as linsey-woolsey). In the meantime, while you're doing your research, I recommend the following books:
Claire Shaeffer's Fabric Sewing Guide
Fabric Science, Fifth Edition
A History of Costume
Subscribe to:
Posts (Atom)